CO2monitorWifi
CO2 monitor based on an ESP32 and a SenseAir S8 sensor
This is a low-cost, do-it-yourself CO2 monitor based on the SenseAir S8 sensor, an ESP32 microcontroller, and a 16x2 LCD display.
The initial version of the project used an Arduino Nano Every board. Here, we’ve switched to an ESP32, which includes wifi (and bluetooth) but is actually less expensive. Wifi access will enable us to automatically log data (including time stamps) to a google spreadsheet using a google form.
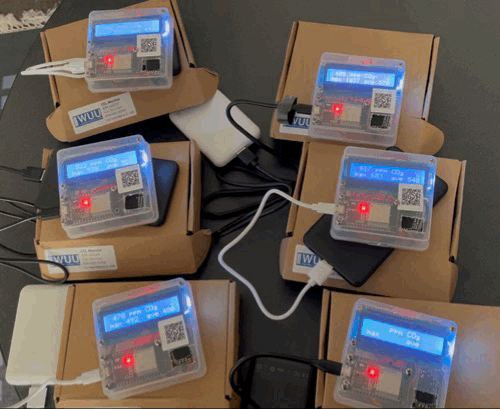
The version of ESP32 I bought is the DOIT DevKit-v1. It has 30 pins, holes at the corners for mounting, and a micro-USB connector. It’s a bit wider and longer than the Arduino Nano we were using before, but it will fit in the same plastic box we have been using.
Parts
The cost of the main components is about US$ 50. (Most of the cost is the sensor, which is about US$ 40. If you’re willing to wait a month for shipping, you can get it much cheaper via AliExpress).
-
ESP32 microcontroller (30-pin DOIT DevKit v1 with mounting holes)

-
16x2 display with I2C chip
-
clear plastic box
To connect the components, you will need 9 female-to-female jumper wires, solder, a soldering iron, 2 2-pin male headers for the SenseAir S8 sensor, plus some 22-gauge wire to patch the LCD display and sensor into a single pin, and 3/32” heat-shrink tubing to cover the solder join.
To attach components to the box, you’ll need some small screws. I used 1/2” 4/40 screws for the LCD display and 5/8” 4/40 screws for the microcontroller. Also some 1/4” plastic stand-offs. I get all this from McMaster-Carr.
Code
You’ll find the code on Github.
There is a required private.h file that defines the wifi SSID and
password, a google form identifier, and the cryptic field names for
the google form. The file not_private.h (which is not used) provides
examples: If HOME is defined (for example, with #define HOME true),
standard wifi WPA2 is used and we need PRIVATE_SSID and
PRIVATE_PASSWORD. Otherwise, enterprise WPA2 is used (for me,
eduroam at my university) and EAP_USERNAME
and EAP_PASSWORD are needed. For the google form, we need
PRIVATE_API_CALL and five field identifiers like PRIVATE_ENTRY1.
The first time using the ESP32 with the Arduino IDE, you will need to install Board Manager and drivers for these boards. Details are in the assembly instructions
My code for interacting with the SenseAir S8 sensor is based on the example code in the S8_UART library.
My code for writing on the LCD (including making custom characters) was based on the example code with the older LiquidCrystal_I2C library, though I ended up using the LCD_I2C library.
The ESP32 has a built-in LED, connected to pin 2. I’m not trying to control it in the code, but it seems to indicate the wifi connection: it flashes at high frequency when connected to wifi, but is solid on when not connected to wifi.
Google form
The connection to wifi with the ESP32 is in order to dump the data to a google spreadsheet on the web. This is done through a google form. For more discussion of the process, see this blog post. You need to create a form and grab the form identifier plus the cryptic field identifiers that google creates. The details are in the assembly instructions.
Libraries
The code uses the following libraries to interact with the S8 sensor and the LCD display, respectively.
Assembly instructions
See the instructions document, which attempts to explain the full process:
-
Prepare the box (drilling holes to mount components and cutting holes for the sensor and the micro-USB cable)
-
Solder headers onto the sensor and solder the patch-wire
-
Mount the components in the box
-
Make connections (see below)
-
Load the software
-
Adjust the contrast on the LCD display
Connections
The 16x2 LCD with I2C has a 4-pin connector:
-
16x2 GND → ESP32 GND (black)
-
16x2 VCC → ESP32 VIN (red)
-
16x2 SDA → ESP32 D21 (green)
-
16x2 SCL → ESP32 D22 (yellow)
The SenseAir S8 needs soldering; you could use two pairs of header pins. See page 3 of the specs for pin information, which is not printed on the sensor.
-
4-pin side, pin 1 (G+) → ESP32 VIN (red)
-
4-pin side, pin 2 (G0) → ESP32 GND (black)
-
5-pin side, pin 2 (UART RX) → ESP32 D12 (green)
-
5-pin side, pin 3 (UART TX) → ESP32 D13 (yellow)
License
This work released under the MIT License.